Parallel to the tutorial for the Borrowing Manager (that name has something wrong...😕😕😕), I was thinking to push this code to GitHub so anyone can have it and modify it, but then I remember that I couldn't find any straight basic Git tutorial so I can learn the easy way how to GIT.....although it is not the best way but you can understand the basics as when I feel like Jon Snow the first time I put GIT on google.....
for the ones who doesn't know what GIT is....from its official page...
Git is a free and open source distributed version control system designed to handle everything from small to very large projects with speed and efficiency.
it is very usefull because if you are working on a new feature of your software or just fixing some bugs, you don't have to create on your machine a lot of copies of your master code because you are to scare to f@*#% your program just because you need to add a comment.....
Coding in my life was like Before Git and After Git.....always I end up with a lot of folders called projectFinal,projectFinalFinal.....projectFinalFinalFinal.....ProjectFinallyMadeIt.......ProjectFinallyMadeItFinal.....
Git lets you creates branches, a copy of you master code so you can modify as you wish and if you are good with it you can merge it into your master branch or revert those changes.......
so lets get into it....
First you must have Git Installed on you machine...if you don't have it you can download from the GIT page https://git-scm.com/
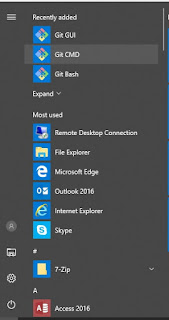
After you installed it search for the Git CMD
then cd to the directory where you code has been created...
type "git init" to create a local repository
then you need to add all those files you want to track to the newly created git repo so you have to type "git add --all"
to check the current status of your repository type "git status", It will show you the branch you are working on and in this case the changes to be commited...
commiting its very important, because help you track the changes you have made to each file to have a better control, helps git to track your repository, and also lets you recover your work if you did something wrong
I have learned that it is important to commit often and also the comments you put on your commit must be meaningful......but I think that it is obvious...
I can commit each file with some different comments....
but because this is the first time I added I'm just gonna add "first commit" to all...
right here are the basics....init, add, status, commit .......this is for creating the local repository, you can work privately with your code on your local repository.....but you can have it also online if you work also with GitHub....
you can Sing Up for free here https://github.com/ and start creating your remote repositories...
when you have already Sign Up seach for the "New Repository" button...
create a repository name, add it some description, check the initialize with a README and select a type of license if you like...then hit Create Repository...
Hooray....your remote repo has been created...then you need to add all that Code full of rage, coffee, bugs and pain from your local repo to your remote repo to this you have to again open Git CMD on your machine.......
first you need to cd to your project folder.....then hit "git remote add <name> <url>" where <name> is the name of the repository and <url> is its url....
this will add a reference to the remote repositories stores on GitHub
then you just have to hit "git push <name> <branch> -f" where <name> is the name of the repo and <branch> is the branch you are currently working on...because I haven't created any branches yet I send it to the master (default)....the -f means I force to push all the files without bothering about the warnings....
NOTE: before doing this check your current status with git status....and commit all the uncommitted files...
and that's it...know you are working like a Pro......although there is to much to learn.....
the next guide will be posted very soon.....


0 comments :
Post a Comment